🚋 axios 理解与使用
🔗 相关链接:axios GitHub axios/axios: Promise based HTTP client for the browser and node.js (github.com) (opens new window)
- 是目前前端最流行的 AJAX 请求库。
- React / Vue 官方推荐使用 axios 发送 AJAX 请求。
可以使用 json-server (opens new window) 搭建一个测试的 http 服务。(创建一个虚拟的 RESTful 风格的请求 API )
- 全局安装 json-server:
$ npm install -g json-server1
# axios 特点
(feaatures from axios GitHub official doc)
- 是基于 XHR + Promise 的异步 AJAX 请求库
- 浏览器端 /node 端都可以使用
- 支持请求 / 响应拦截器
- 支持请求取消
- 请求 / 响应数据转换
- 批量发送多个请求
# axios 的基本使用
🌰 例子:

- 发送 GET 请求:
btns[0].onclick = function (){
    // 发送AJAX请求GET
    axios({
     		// 请求方法
        method: 'GET',
      	// 请求路径url
        url: 'http://localhost:3000/posts/2',
    }).then(response => {
      	// 返回promise类型
        console.log(response)
    })
}
2
3
4
5
6
7
8
9
10
11
12
- 发送 POST 请求:
btns[1].onclick = function (){
    // 发送AJAX请求POST
    axios({
        method: 'POST',
        url: 'http://localhost:3000/posts',
        // 设置请求体
        data: {
            title: 'testAddPosts',
            author: 'Simon'
        }
    }).then(response => {
        console.log(response)
    })
}
2
3
4
5
6
7
8
9
10
11
12
13
14
- 发送 PUT 请求:
btns[2].onclick = function (){
    // 发送AJAX请求PUT 更新数据
    axios({
        method: 'PUT',
        url: 'http://localhost:3000/posts/3',
        // 设置请求体
        data: {
            title: 'testAddPosts',
            author: 'Nomis'
        }
    }).then(response => {
        console.log(response)
    })
}
2
3
4
5
6
7
8
9
10
11
12
13
14
- 发送 DELETE 请求:
btns[3].onclick = function (){
    // 发送AJAX请求PUT 更新数据
    axios({
        method: 'DELETE',
        url: 'http://localhost:3000/posts/4',
    }).then(response => {
        console.log(response)
    })
}
2
3
4
5
6
7
8
9
# axios 语法
发送请求的方法:
axios(config): 通用 / 最本质的发任意类型请求的方式axios(url[, config]):可以只指定 url 发 get 请求axios.request(config):等同于axios(config)axios.get(url[, config]): 发 get 请求axios.delete(url[, config]): 发 delete 请求axios.post(url[, data, config]):发 post 请求axios.put(url[, data, config]): 发 put 请求
🌰 例子(使用 axios.request(config)) ):
// 发送get请求
btns[0].onclick = function (){
    axios.request({
        method: 'GET',
        url: 'http://localhost:3000/posts'
    }).then(response=>{
        console.log(response)
    })
}
2
3
4
5
6
7
8
9
🌰 例子(使用 axios.post() 发送 post 请求):
btns[1].onclick = function () {
    axios.post(
        'http://localhost:3000/posts', {
            title: 'testAddPosts',
            author: 'Simon'
        }
    ).then(response => {
        console.log(response)
    })
}
2
3
4
5
6
7
8
9
10
( axios.put() 、 axios.delete() 的使用与上大同小异)
# axios 响应对象
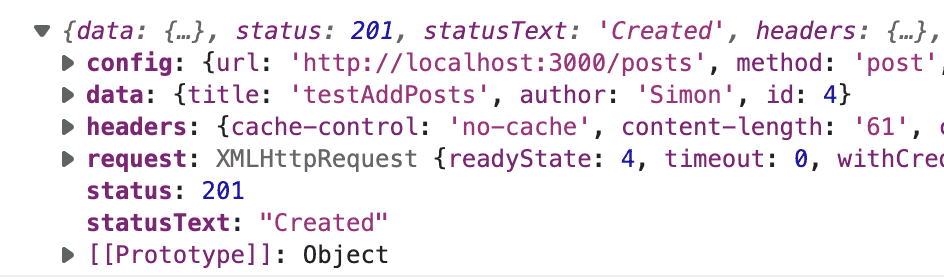
响应对象 response 对象
config:配置对象的属性。data:响应体的结果(服务器返回的结果)(axios 自动将服务器返回的结果转化为对象方便处理)。headers:响应头信息。request:AJAX 原生请求对象(axios 发送请求时创建的)。status:响应状态码 /status: 响应字符串。
# axios 请求对象
axios 发送请求时的配置对象 config :
{
  url: '/user', // 请求的路径
  method: 'get', // 请求方法,默认为get
  baseURL: 'https://localhost:3000/api', // 基础结构,在设置url只设置路径即可,axios自动拼接为完整的请求路径
  transformRequest: [function (data, headers) {
    // Do whatever you want to transform the data

    return data;
  }], // 对请求的数据进行处理再发送到服务器
  transformResponse: [function (data) {
    // Do whatever you want to transform the data

    return data;
  }], // 对服务器响应的结果进行处理再接收

  headers: {'X-Requested-With': 'XMLHttpRequest'}, // 请求头信息自定义控制

  params: {
    id: 1,
    name: simon
  }, // 设置发送请求时传递的参数,在对象中设置

  // (e.g. https://www.npmjs.com/package/qs, http://api.jquery.com/jquery.param/)
  paramsSerializer: function (params) {
    return Qs.stringify(params, {arrayFormat: 'brackets'})
  }, // 参数序列化(对请求的参数处理格式)

  data: {
    firstName: 'Fred'
  }, // 请求体设置,参数为对象会转为json,字符串直接传递

	timeout: 1000, // default is `0` (no timeout)
  // ... 更多前往官方文档中参考
}
2
3
4
5
6
7
8
9
10
11
12
13
14
15
16
17
18
19
20
21
22
23
24
25
26
27
28
29
30
31
32
33
34
# axios 更多 API
# axios 的默认配置
axios.defalut.* (将常用的请求方法,请求路径中设置为默认后,后面调使用 axios 请求方法时可以调用为默认配置使用。)
🌰 例子:
axios.default.method = 'GET' // 设置默认请求类型为get
axios.default.baseURL = 'http://localhost:3000' // 设置基础的URL
axios.default.params = {id: 1} // 设置默认的请求参数
axios.default.timeout = 3000; // 设置默认的超时时间

btns[0].onclick = function () {
    axios.request({
        url: '/posts'
    }).then(response => {
        console.log(response)
    })
}
2
3
4
5
6
7
8
9
10
11
12
# axios 创建实例对象
axios.create({config}) 。作用:如果服务器的接口(端口)有多个,在每次创建请求时创建的请求对象可以根据不同的服务器进行不同的配置。
// 创建axios实例对象, 与aixos的功能近乎一样
const getDuanzi = axios.create({
    baseURL: 'https://api.apiopen.top',
    timeout: 2000
})

// 请求
/*getDuanzi({
    url: '/getJoke'
}).then(response=>{
    console.log(response)
})*/

getDuanzi.get('/getJoke').then(response=>{
    console.log(response.data)
})
2
3
4
5
6
7
8
9
10
11
12
13
14
15
16
# axios 拦截器
axios.interceptors.*.use 实质上是函数,分为两种:请求拦截器、响应拦截器,内部原理与 Promise 有关:
- 请求拦截器:发送请求之前,借助指定回调(函数)对请求的参数进行预处理(检测),如果没有问题则发送请求,有问题则拦截。
- 响应拦截器:服务器返回结果,借助的回调对返回的结果进行预处理,结果格式化或者结果问题监测。
🌰 例子(请求拦截器与响应拦截器的配置):
// 配置请求拦截器
axios.interceptors.request.use(function (config) {
    // 请求发送之前对请求的操作
    console.log('request success')
    return config;
}, function (error) {
    console.log('request fail')
    return Promise.reject(error);
});
2
3
4
5
6
7
8
9
// 配置响应拦截器
axios.interceptors.response.use(function (response) {
    // 成功响应后(响应码在200以内)对响应进行的操作
    console.log('response success')
    return response;
}, function (error) {
    // 响应出错(响应码200以外)对响应的操作
    console.log('response  fail')
    return Promise.reject(error);
});
2
3
4
5
6
7
8
9
10
请求 / 响应成功后,拦截器进行的顺序如下:

当请求中出现错误抛出异常时,拦截器执行情况如下:

拦截器执行顺序:
- 请求拦截器最后声明的先执行。
- 响应拦截器的先声明的先执行。
🌰 请求拦截器处理请求参数配置 config :
axios.interceptors.request.use(function (config) {
    // 请求发送之前对请求的操作
    config.params = {a: 100}
    config.timeout = 2000
    console.log('request interceptors success')
    return config;
}, function (error) {
    console.log('request interceptors fail')
    return Promise.reject(error);
});
2
3
4
5
6
7
8
9
10
🌰 响应拦截器处理响应参数 response :
axios.interceptors.response.use(function (response) {
    console.log('response interceptors success')
    console.log(response) // Promise创建的响应结果对象
    console.log(response.data) // 只有响应体
    return response;
}, function (error) {
    console.log('response interceptors  fail')
    return Promise.reject(error);
});
2
3
4
5
6
7
8
9
# axios 取消请求
axios.CancelToken()
在 json-server 中开启延时响应:
$ json-server --watch db.json -d 20001
🌰 例子:
//获取按钮
const btns = document.querySelectorAll('button');
//2.声明全局变量
let cancel = null;
//发送请求
btns[0].onclick = function(){
    //检测上一次的请求是否已经完成
    if(cancel !== null){
        //取消上一次的请求
        cancel();
    }
    axios({
        method: 'GET',
        url: 'http://localhost:3000/posts',
        //1. 添加配置对象的属性
        cancelToken: new axios.CancelToken(function(c){
            //3. 将 c 的值赋值给 cancel
            cancel = c;
        })
    }).then(response => {
        console.log(response);
        //将 cancel 的值初始化
        cancel = null;
    })
}

//绑定第二个事件取消请求
btns[1].onclick = function(){
    cancel();
}
2
3
4
5
6
7
8
9
10
11
12
13
14
15
16
17
18
19
20
21
22
23
24
25
26
27
28
29
30